Contents
How to Cut Copper Pipe A Step-by-Step Guide

If you’re taking on a plumbing project that involves working with copper pipe or tubing, one of the first skills you’ll need to master is cutting. Whether you’re repairing a leak or installing new plumbing fixtures, knowing how to cut copper pipe properly is essential for a successful project.
There are several tools you can use to cut copper pipe, but one of the most common and versatile options is a saw with a fine-tooth blade. This type of saw is specifically designed for cutting metal, and its fine teeth make clean and precise cuts in copper pipe.
Before you start cutting, it’s important to measure and mark the pipe where you want to make the cut. Use a tape measure or ruler to ensure accuracy, and mark the pipe with a pencil or marker. This will serve as a guide to help you make a straight cut.
Once you have your measurements and markings in place, it’s time to start cutting. Position the pipe securely in a vice or pipe cutter, making sure it’s stable and won’t move while you’re cutting. Then, using your saw, carefully follow the markings and make a steady, back-and-forth motion to cut through the copper pipe.
Remember to wear safety goggles and gloves when cutting copper pipe, as metal shavings and sharp edges can be hazardous. Additionally, be cautious of the saw blade and avoid any sudden movements or excessive force that could cause the blade to slip or break.
By following these step-by-step instructions, you’ll be able to cut copper pipe with confidence and precision. Whether you’re a DIY enthusiast or a professional plumber, mastering this skill will make your plumbing projects much easier and more successful.
Why Cutting Copper Pipe is Important

When it comes to plumbing, cutting copper pipe is an essential skill that every plumber should have. Whether you are installing new plumbing or making repairs, being able to cut copper pipe accurately and cleanly is crucial for ensuring a proper fit and preventing leaks.
One of the main reasons why cutting copper pipe is important is because it allows you to create the right length of pipe for your specific plumbing project. Copper pipe typically comes in long lengths, and you will often need to cut it down to fit the specific measurements of your installation. By cutting the pipe to the correct length, you can ensure a tight and secure connection.
Another reason why cutting copper pipe is important is because it allows you to remove any damaged or corroded sections of pipe. Over time, copper pipe can develop leaks or become weakened due to corrosion. By cutting out the damaged section and replacing it with a new piece of pipe, you can restore the integrity of the plumbing system and prevent further issues.
Using the right tools for cutting copper pipe is also crucial. A saw or blade specifically designed for cutting copper pipe, such as a pipe cutter or tubing cutter, will ensure clean and precise cuts. These tools are designed to create a smooth and even cut, reducing the risk of leaks and making it easier to connect the pipe with other fittings.
Overall, cutting copper pipe is an important step in any plumbing project. It allows you to create the right length of pipe, remove damaged sections, and ensure a proper fit. By using the appropriate tools and techniques for cutting copper pipe, you can ensure the success and longevity of your plumbing system.
Ensuring Proper Fit

When working with copper pipe, it is crucial to ensure a proper fit before cutting. This will help prevent any leaks or issues with the plumbing system. Here are some steps to follow to ensure a proper fit:
- Measure the pipe: Use a tape measure or ruler to measure the length of the pipe that you need. Make sure to account for any fittings or connections that will be added.
- Select the right cutter: Choose the appropriate cutter for the size of the copper pipe. There are various types of cutters available, such as a tubing cutter or a hacksaw. Make sure the cutter is sharp and in good condition.
- Prepare the pipe: Before cutting, use a deburring tool or sandpaper to remove any burrs or rough edges from the cut end of the pipe. This will ensure a smooth and clean connection.
- Make the cut: Place the cutter around the pipe, making sure it is aligned properly. Rotate the cutter around the pipe, applying gentle pressure. Continue rotating until the pipe is cut through. If using a hacksaw, make sure to use a guide or miter box to ensure a straight cut.
- Check the fit: After cutting the pipe, check the fit by inserting it into the fitting or connection. The pipe should fit snugly without any gaps or wobbling. If the fit is too tight or too loose, recut the pipe as needed.
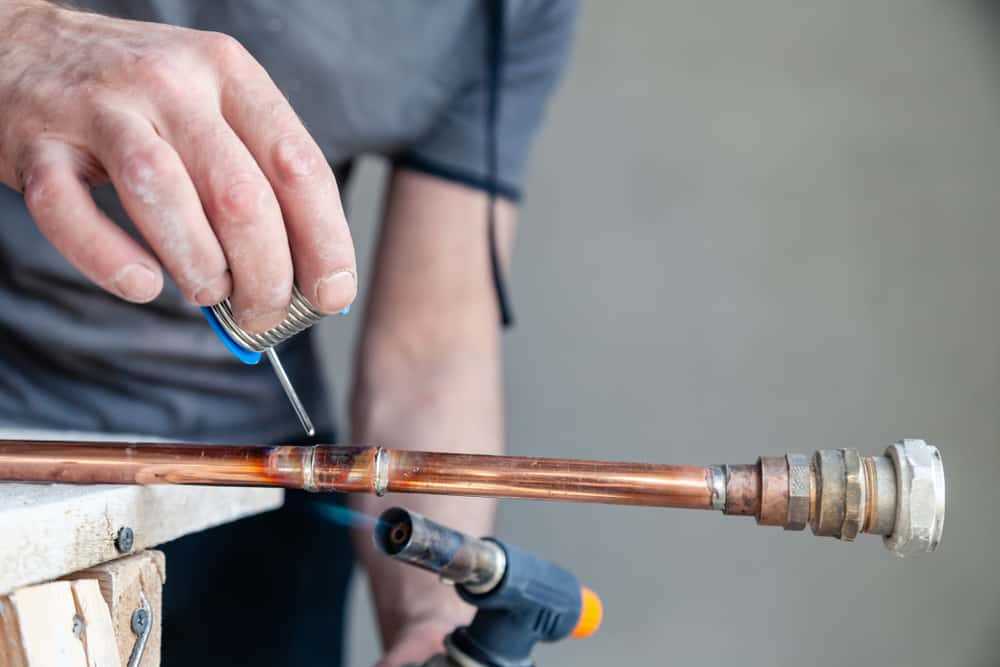
- Secure the pipe: Once the proper fit is achieved, use a soldering torch or other appropriate method to secure the pipe to the fitting or connection. Follow proper soldering techniques to ensure a strong and leak-free joint.
By following these steps, you can ensure a proper fit when cutting copper pipe for your plumbing project. Remember to always use the appropriate tools and take safety precautions when working with copper and other plumbing materials.
Repairing or Replacing Pipes

If you have a plumbing issue or need to make changes to your plumbing system, you may need to repair or replace pipes. Here are the steps to follow:
- Identify the problem: Determine whether the pipe needs to be repaired or replaced. Look for signs of leaks, corrosion, or damage.
- Gather the necessary tools: Depending on the type of repair or replacement, you may need a pipe cutter, saw, or tubing cutter. Make sure you have the appropriate tools on hand.
- Turn off the water supply: Before starting any repair or replacement work, shut off the water supply to the affected area. This will prevent any further damage or flooding.
- Cutting the pipe: If you need to replace a section of pipe, use a pipe cutter or saw to cut the copper pipe at the desired location. Be careful not to damage any nearby pipes or fittings.
- Removing the old pipe: Once the pipe is cut, remove the old section by pulling it out or unscrewing any fittings. Clean the ends of the remaining pipes.
- Installing the new pipe: Measure and cut a new section of copper pipe to fit the gap. Use a tubing cutter or pipe cutter to ensure a clean, straight cut.
- Connecting the new pipe: Attach the new pipe to the existing plumbing system using appropriate fittings, such as couplings or soldering.
- Testing for leaks: Turn on the water supply and check for any leaks. If there are no leaks, you have successfully repaired or replaced the pipe.
Remember to always follow safety precautions when working with plumbing systems. If you are unsure about any step or encounter difficulties, it is best to consult a professional plumber.
Tools and Materials

To successfully cut copper pipe or tubing, you will need a few essential tools and materials. These include:
- Cutting tool: A saw or pipe cutter specifically designed for cutting copper is necessary. There are different types of pipe cutters available, such as a tube cutter or a hacksaw.
- Copper pipe or tubing: The material you will be cutting. Copper pipes are commonly used in plumbing and heating systems due to their durability and resistance to corrosion.
- Measuring tape: This is needed to measure the length of the pipe accurately.
- Marker or pencil: To mark the spot where you want to cut the pipe.
- Deburring tool: After cutting the pipe, a deburring tool is used to remove any rough edges or burrs left behind.
- Safety equipment: It is essential to wear safety goggles and gloves to protect yourself from any potential injuries during the cutting process.
By having the necessary tools and materials on hand, you will be well-prepared to cut copper pipe or tubing for your plumbing projects.
Necessary Tools

To cut copper pipe, you will need the following tools:
- Cutting Cutter: A cutting cutter is a specialized tool designed specifically for cutting copper pipe. It has a sharp blade that can easily cut through the tubing.
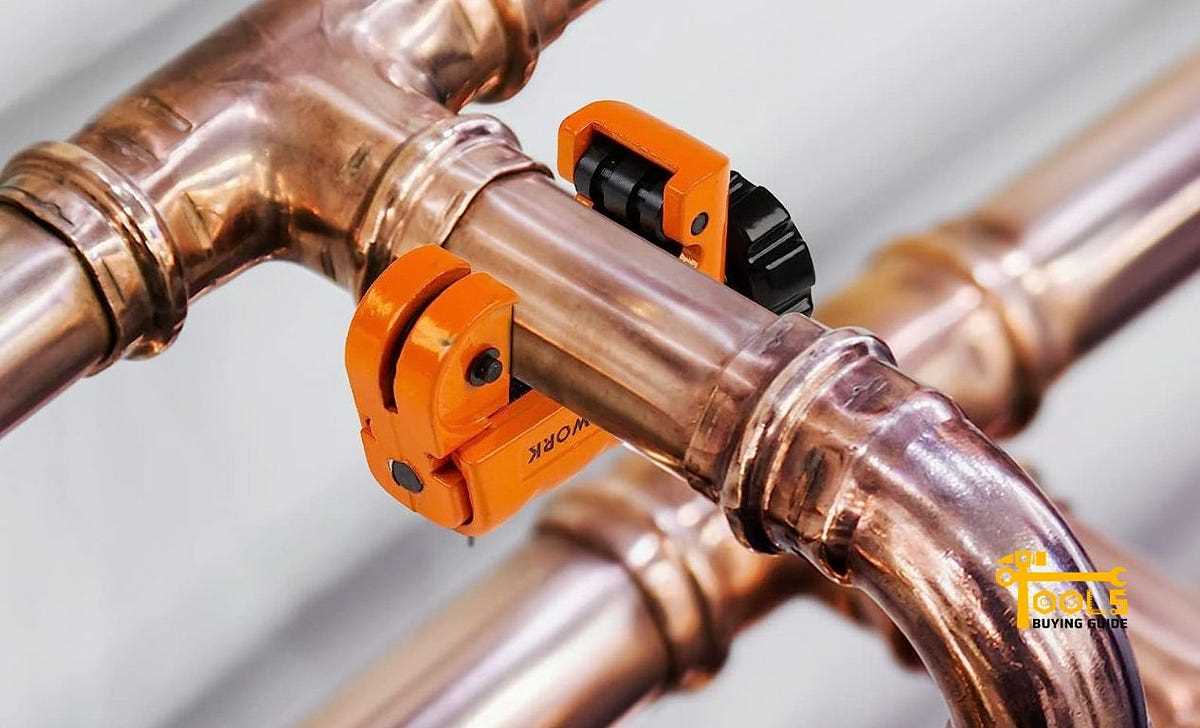
- Copper Pipe Cutter: A copper pipe cutter is another option for cutting copper pipes. It works by rotating around the pipe and gradually tightening until it cuts through.
- Blade: The blade of the cutting cutter or copper pipe cutter is responsible for cutting through the copper pipe. Make sure the blade is sharp to ensure a clean and precise cut.
- Plumbing Tools: In addition to the cutting tools, you may also need other plumbing tools like a pipe wrench, pliers, or a soldering torch, depending on the specific project.
Having the right tools is essential for a successful and efficient copper pipe cutting process. Make sure to gather all the necessary tools before starting your project to avoid any delays or complications.
Pipe Cutter

A pipe cutter is a tool used for cutting tubing or plumbing pipes. It is commonly used in the construction and plumbing industries to cut copper pipes. The pipe cutter is designed to make clean and precise cuts, ensuring that the pipe ends are smooth and even.
There are different types of pipe cutters available, but the most common one is the rotary pipe cutter. This type of cutter consists of a cutting wheel that is attached to a handle. The cutting wheel is made of hardened steel and has sharp edges that can easily cut through copper pipe.
To use a pipe cutter, follow these steps:
- Measure the length of pipe you need to cut and mark it with a pencil.
- Place the pipe cutter around the pipe, with the cutting wheel aligned with the mark.
- Tighten the pipe cutter’s handle to secure it in place.
- Rotate the pipe cutter around the pipe several times, applying steady pressure.
- Continue rotating the pipe cutter until the pipe is cut all the way through.
Once the pipe is cut, you can use a deburring tool or a file to remove any sharp edges or burrs from the cut end. This will ensure that the pipe fits properly into fittings or connectors.
Using a pipe cutter is a quick and efficient way to cut copper pipe. It is much easier and cleaner than using a saw, as it produces less debris and doesn’t require as much physical effort. However, it is important to use the pipe cutter correctly to avoid damaging the pipe or injuring yourself.
Overall, a pipe cutter is an essential tool for any plumber or DIY enthusiast who frequently works with copper pipes. It provides a precise and clean cut, making it easier to install and connect pipes in plumbing systems.
Deburring Tool

When working with copper pipe or tubing for plumbing purposes, it is important to ensure that the edges are smooth and free from burrs. Burrs can cause leaks or damage to fittings, so it is crucial to remove them before installing the pipe. This is where a deburring tool comes in handy.
A deburring tool is a specialized tool designed to remove burrs from the cut ends of copper pipe or tubing. It typically consists of a handle and a cutting blade. The blade is made from hardened steel and is designed to shave off the burrs as you run it along the edge of the pipe.
Using a deburring tool is simple. After cutting the copper pipe with a pipe cutter or saw, you can use the deburring tool to remove any burrs or rough edges. Here’s how:
- Hold the deburring tool in one hand, with the blade facing away from you.
- Place the blade against the edge of the cut pipe, applying slight pressure.
- Rotate the deburring tool around the edge of the pipe, making sure to cover the entire circumference.
- Continue rotating the deburring tool until you feel the burrs being shaved off.
- Inspect the edge of the pipe to ensure that it is smooth and free from burrs.
It is important to note that the deburring tool should only be used on the outside edge of the pipe. It is not necessary to deburr the inside of the pipe, as the fittings will cover any rough edges.
A deburring tool is an essential tool for any plumber or DIY enthusiast working with copper pipe. It ensures that the pipe ends are smooth and free from burrs, resulting in a secure and leak-free connection.
Additional Materials

- Blade: You will need a sharp blade to make clean and precise cuts on the copper pipe.
- Pipe: Of course, you will need the copper pipe that you want to cut. Make sure to measure and mark the desired length before cutting.
- Copper tubing cutter: This tool is specifically designed for cutting copper pipes. It has a sharp cutting wheel that makes clean cuts without deforming the pipe.
- Plumbing tools: You may need various plumbing tools like a wrench or pliers to hold the pipe steady while cutting.
- Saw: In some cases, a saw may be used to cut copper pipes, especially for larger pipes. However, using a saw may leave rough edges that need to be smoothed out.
Video:How to Cut Copper Pipe A Step-by-Step Guide
How to cut copper tube with a pipe cutter tool
How to Tee into Copper Pipe THE EASY WAY
Learn How To Use A Pipe Cutter To Cut Copper Pipe
3 Easy Step By Step Ways To Repair & Connect Copper Pipe!
Hello, I am Beverly J. Sanders, the voice behind the diverse articles you come across on styves.co.za. My passion lies in exploring the nuances of home improvement and sharing tips that can help you transform your living space into a haven of comfort and style. From the latest trends in home decor to practical cleaning advice, I cover a broad spectrum of topics to cater to a wide variety of interests.
In my recent works, I have delved into the advantages of incorporating a horizontal Murphy bed into your home to save space without compromising on design and functionality. I also explored the benefits of having a free-standing electric fireplace that not only adds warmth to your home but also brings a sleek and modern design to any living space. My articles are a rich resource, offering insights into different products and home improvement strategies that can enhance the quality of your life.
I believe in the power of details; a belief that reflects in my comprehensive guides where I discuss even the overlooked aspects of home decor, such as the impact of baseboard trim in enhancing the overall look and feel of your home. I am constantly on the lookout for innovative solutions and products that can add value to your home and life.
Join me in my exploration as I continue to bring you the latest trends, tips, and insights in the home improvement world. Let’s create a home that is not just a place to live, but a reflection of style and personality.