Contents
How to Cut Quarter Round A Step-by-Step Guide

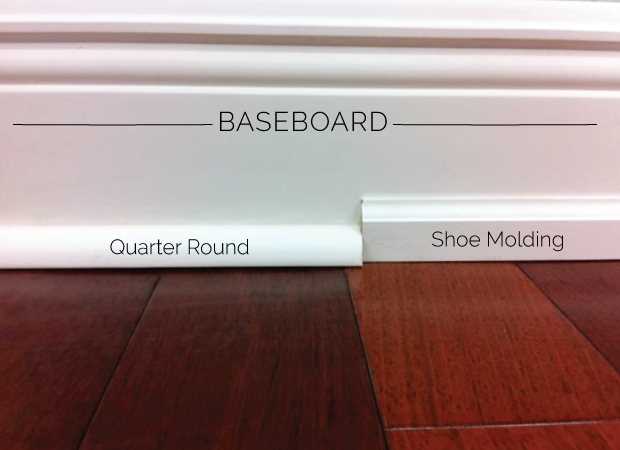
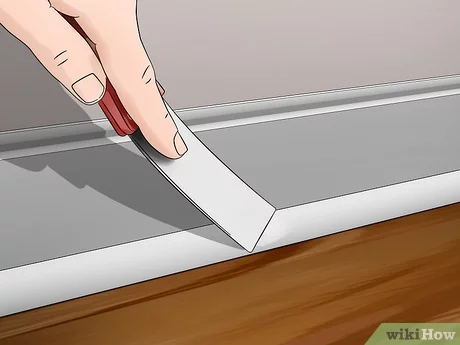
Quarter round is a type of molding or trim that is commonly used to cover gaps between the baseboard and the floor or between the baseboard and the wall. It is called “quarter round” because it is a quarter of a circle in shape. Cutting quarter round may seem like a daunting task, but with the right tools and a few simple steps, you can easily achieve a professional-looking finish.
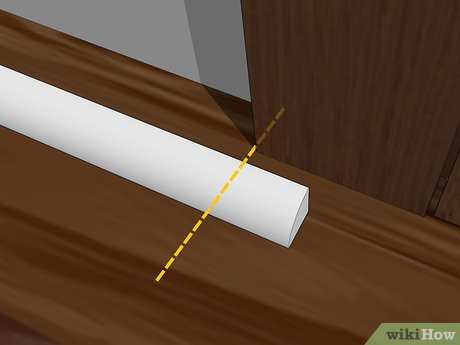
Before you begin cutting quarter round, it is important to measure the area where you will be installing the trim. Use a tape measure to determine the length of the molding needed. Keep in mind that the ends of the quarter round should be cut at a 45-degree angle to create a clean, seamless look. Once you have your measurements, mark the molding with a pencil to indicate where you will make your cuts.
Next, you will need a saw to cut the quarter round. A miter saw or a coping saw are both suitable options for this task. If using a miter saw, set the blade to a 45-degree angle and carefully line up the marked lines on the molding with the blade. Make sure to hold the molding securely in place and use a slow, steady motion to cut through the wood. If using a coping saw, follow the same process but use a back-and-forth motion to cut along the marked lines.
Once you have cut the quarter round to the desired length and angle, it is time to install the trim. Start by applying a small amount of adhesive to the back of the molding. Press the quarter round firmly against the wall or baseboard, making sure it is aligned properly. You can also use finishing nails to secure the trim in place. Simply hammer the nails into the molding at an angle, being careful not to split the wood. Repeat this process for each piece of quarter round until the entire area is covered.
In conclusion, cutting quarter round is a straightforward process that can be accomplished with a few simple tools and careful measurements. By following these step-by-step instructions, you can achieve a professional-looking finish and add a stylish touch to any room.
How to Cut Quarter Round
The quarter round is a type of molding that is used to trim the edges of flooring, cabinets, and other surfaces. It is called quarter round because it is a quarter of a round shape. Cutting quarter round is a relatively simple process that can be done with a few basic tools.
To cut quarter round, you will need the following tools:
- A saw
- A measuring tape
- An angle finder
Here are the steps to cut quarter round:
- Measure the area where you will be installing the quarter round. Use a measuring tape to determine the length of the edge you need to trim.
- Use an angle finder to determine the angle at which the quarter round needs to be cut. This will ensure a proper fit.
- Transfer the angle measurement to the quarter round. Use a pencil to mark the angle on the molding.
- Secure the quarter round to a stable surface, such as a workbench or sawhorse.
- Using a saw, carefully cut along the marked angle. Take your time and make sure to follow the line closely.
- Once the cut is complete, check the fit of the quarter round against the surface you are trimming. Make any necessary adjustments.
- Repeat the process for any additional pieces of quarter round that need to be cut.
- Once all of the quarter round has been cut, you can install it. Use a nail gun or adhesive to secure the molding in place.
- Trim any excess material and clean up the area.
And that’s it! Now you know how to cut quarter round. With a few simple steps and the right tools, you can easily trim and install quarter round molding to give your surfaces a finished look.
What is quarter round?
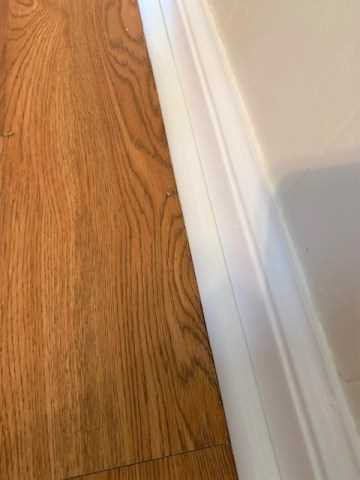
Quarter round is a type of molding that is commonly used to cover gaps between the baseboard and the floor or between the baseboard and the wall. It is called “quarter round” because it is a quarter of a circle in shape.
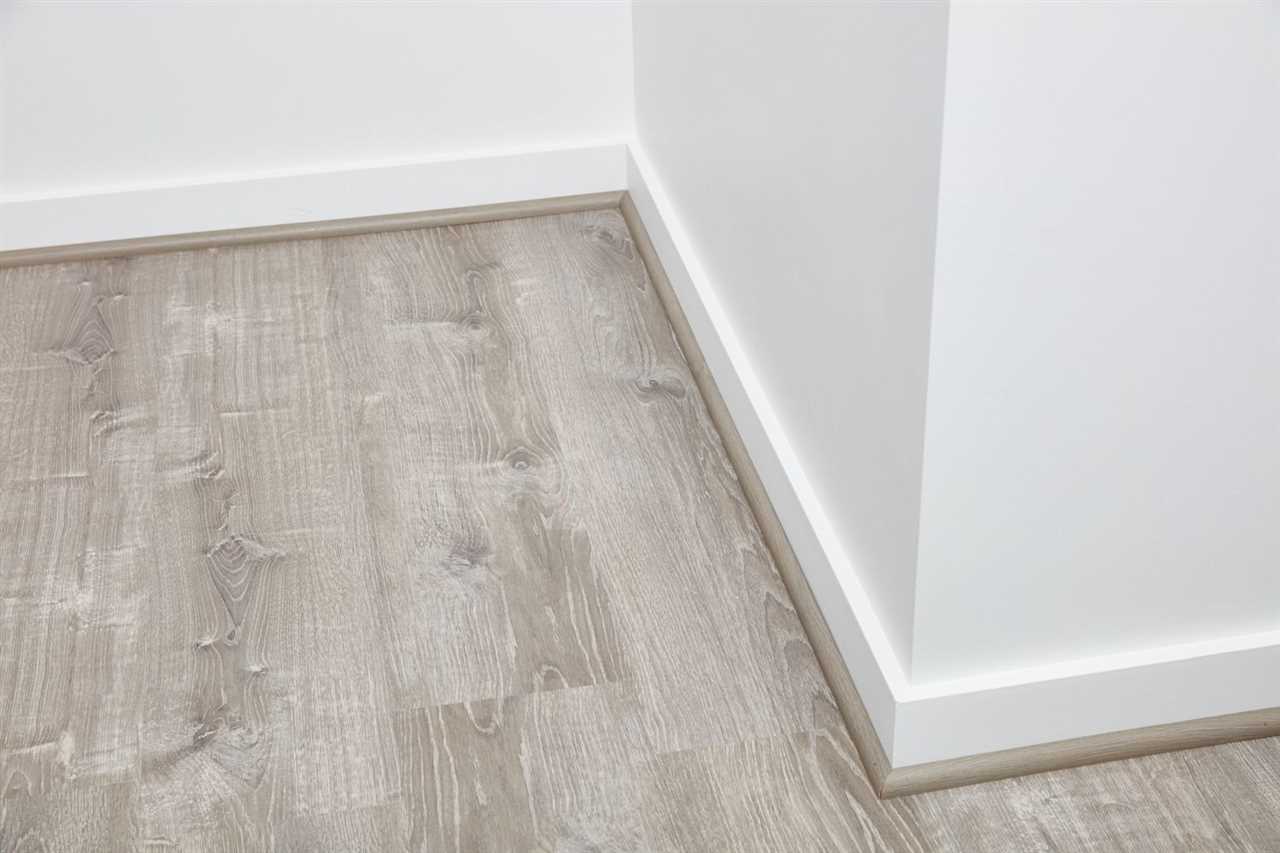
The purpose of quarter round is to provide a finished look to the edges of the flooring and the baseboard. It can also help to hide any imperfections or gaps that may exist between the two surfaces.
Quarter round is typically made of wood or a composite material, and it is available in a variety of sizes and finishes to match different types of flooring and decor styles. It can be painted or stained to match the baseboard or left unfinished for a natural look.
To install quarter round, you will first need to measure the length of the area where it will be installed. Then, you will need to cut the quarter round to the appropriate length using a saw. Once the quarter round is cut, you can attach it to the baseboard or the floor using nails or adhesive.
When cutting quarter round, it is important to use a saw that is appropriate for the material you are working with. A miter saw or a coping saw are commonly used for cutting quarter round. It is also important to wear safety goggles and gloves to protect yourself from any flying debris.
Overall, quarter round is a versatile and practical molding that can add a finishing touch to any room. Whether you are installing new flooring or simply updating the look of your baseboards, quarter round can help to create a polished and professional appearance.
Why is it important to cut quarter round?
The quarter round trim is an essential part of any flooring installation project. It is a small, rounded molding that is typically used to cover the gap between the baseboard and the flooring. Cutting the quarter round to the right size and angle is crucial for a professional and finished look.
Here are a few reasons why it is important to cut quarter round:
- Proper fit: Cutting the quarter round allows you to achieve a proper fit between the molding and the wall or baseboard. This ensures that there are no gaps or uneven edges, giving your flooring a clean and polished appearance.
- Seamless transition: By cutting the quarter round to the correct length and angle, you can create a seamless transition between the baseboard and the flooring. This helps to hide any imperfections or unevenness in the installation.
- Avoid tripping hazards: Cutting quarter round allows you to trim any excess molding that may cause a tripping hazard. This is especially important in high-traffic areas or rooms where there are children or elderly individuals.
- Enhance aesthetics: Cutting quarter round with precision can greatly enhance the aesthetics of your flooring. By ensuring a proper fit and angle, you can create a professional and finished look that adds value to your home.
When cutting quarter round, it is important to use the right tools, such as a miter saw or a coping saw, to achieve clean and accurate cuts. Taking accurate measurements and using the appropriate cutting techniques will help you achieve the desired results.
Overall, cutting quarter round is an important step in the installation process that should not be overlooked. It helps to create a clean and polished look, ensures a proper fit, and enhances the overall aesthetics of your flooring.
What tools do you need?

When it comes to cutting quarter round molding, you will need a few essential tools to get the job done properly. These tools will help you measure and cut the quarter round trim at the correct angles, ensuring a precise fit. Here are the tools you will need:
- Saw: A saw is the primary tool you will need to cut the quarter round molding. A miter saw or a coping saw is commonly used for this task.
- Measuring tape: A measuring tape is essential for accurately measuring the length of the quarter round trim.
- Protractor or angle finder: An angle finder or a protractor will help you determine the correct angle at which to cut the quarter round molding.
- Pencil or marker: A pencil or marker will be used to mark the measurements and cutting lines on the quarter round trim.
- Clamps: Clamps are useful for securing the quarter round molding in place while cutting.
- Safety goggles: Safety goggles are important to protect your eyes from any flying debris while cutting the quarter round trim.
- Dust mask: A dust mask is recommended to prevent inhalation of any sawdust or debris.
- Sanding block or sandpaper: A sanding block or sandpaper will be needed to smooth out any rough edges or imperfections on the cut quarter round trim.
Having these tools on hand will ensure that you have everything you need to cut quarter round molding accurately and safely.
Step 1: Measure and mark the quarter round
Before you begin cutting the quarter round, you need to measure and mark the pieces to ensure a proper fit and installation. Here’s how to do it:
- Start by measuring the length of the area where you will be installing the quarter round. Use a tape measure to get an accurate measurement.
- Add a little extra length to allow for trimming and cutting. It’s always better to have a little extra than to come up short.
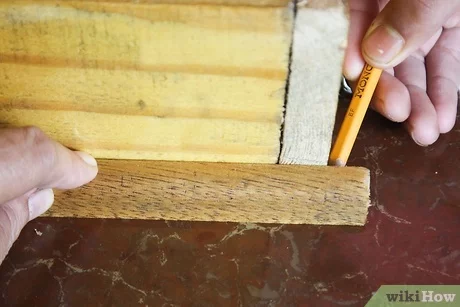
- Using a pencil or a marker, mark the length on the quarter round. Make sure to mark both ends.
- If you need to cut the quarter round at an angle, measure the angle using an angle finder or a protractor. Mark the angle on the quarter round.
- Repeat this process for each piece of quarter round you will be installing.
Once you have measured and marked the quarter round, you are ready to move on to the next step, which is cutting the pieces to size.
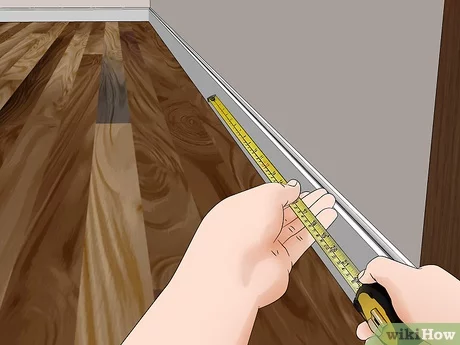
Measure the length
Before you can begin cutting the quarter round molding, you need to measure the length of the area where you will be installing it. This will ensure that you cut the molding to the correct size and avoid any unnecessary waste.
To measure the length, use a tape measure and measure from one corner to the opposite corner of the room. Make sure to account for any angles or corners that may require additional cutting.
Once you have the measurement, add a few extra inches to account for any mistakes or miscalculations. It’s always better to have a little extra length than not enough.
Write down the measurement so you can refer to it later when cutting the quarter round molding.
Mark the cutting points
Before you start cutting your quarter round trim, you need to mark the cutting points. This will ensure that you make precise cuts and achieve a professional-looking finish.
To mark the cutting points, you will need a measuring tape and a pencil. Here’s how to do it:
- Measure the length of the area where you want to install the quarter round trim. Use the measuring tape to get an accurate measurement.
- Transfer the measurement to the quarter round trim. Place the trim on a flat surface and use the pencil to mark the measurement on the trim.
- Determine the angle of the corner where the trim will be installed. Most corners are 90 degrees, but some may be different. Use a protractor or angle finder to measure the angle of the corner.
- Transfer the angle measurement to the quarter round trim. Use the pencil to mark the angle on the trim.
- Repeat the process for each piece of quarter round trim that you need to cut.
By marking the cutting points, you will have a clear guide for where to make your cuts. This will help you avoid mistakes and ensure that your quarter round trim fits perfectly in place.
Double-check the measurements

Before you start the installation process, it’s important to double-check your measurements to ensure accuracy. Cutting quarter round molding requires precision, as any mistakes can result in ill-fitting trim that won’t properly cover gaps or corners.
Here are the steps to double-check your measurements:
- Measure the length of the wall: Use a tape measure to determine the length of the wall where the quarter round molding will be installed. Make sure to measure from one corner to the other, accounting for any angles or corners.
- Measure the angle of the corner: If there are any corners, use an angle finder tool to measure the angle of the corner. This will help you determine the correct angle to cut the quarter round molding.
- Measure the width of the quarter round molding: Take note of the width of the quarter round molding you will be using. This will help you determine how much trim you will need for the installation.
- Calculate the length of the trim: Based on the measurements of the wall and the width of the quarter round molding, calculate the length of the trim needed. Add a few extra inches to account for any mistakes or adjustments that may need to be made during the cutting and installation process.
By double-checking your measurements, you can ensure that you have the correct dimensions for your quarter round molding. This will help you avoid any unnecessary mistakes or wastage of materials during the cutting process.
Step 2: Set up the miter saw
Before you begin cutting your quarter round trim, you’ll need to set up your miter saw. The miter saw is a specialized tool that allows you to make precise angled cuts in molding and trim.
Here are the steps to set up your miter saw:
- Measure the angle: Use a protractor or angle finder to determine the angle at which you need to cut your quarter round trim. Most quarter round trim is cut at a 45-degree angle, but it’s always a good idea to double-check the angle before cutting.
- Adjust the miter saw: Locate the miter angle adjustment on your miter saw. This is usually a knob or lever that allows you to adjust the angle of the saw blade. Set the miter angle to match the angle you measured in the previous step.
- Secure the quarter round: Place the quarter round trim on the miter saw table, with the back of the trim against the fence of the saw. Make sure the trim is securely held in place before you start cutting.
Once you have set up your miter saw, you are ready to start cutting your quarter round trim. Remember to always wear safety goggles and follow the manufacturer’s instructions when operating power tools.
Video:How to Cut Quarter Round A Step-by-Step Guide
How to cut Quarter round on the chop saw
Hello, I am Beverly J. Sanders, the voice behind the diverse articles you come across on styves.co.za. My passion lies in exploring the nuances of home improvement and sharing tips that can help you transform your living space into a haven of comfort and style. From the latest trends in home decor to practical cleaning advice, I cover a broad spectrum of topics to cater to a wide variety of interests.
In my recent works, I have delved into the advantages of incorporating a horizontal Murphy bed into your home to save space without compromising on design and functionality. I also explored the benefits of having a free-standing electric fireplace that not only adds warmth to your home but also brings a sleek and modern design to any living space. My articles are a rich resource, offering insights into different products and home improvement strategies that can enhance the quality of your life.
I believe in the power of details; a belief that reflects in my comprehensive guides where I discuss even the overlooked aspects of home decor, such as the impact of baseboard trim in enhancing the overall look and feel of your home. I am constantly on the lookout for innovative solutions and products that can add value to your home and life.
Join me in my exploration as I continue to bring you the latest trends, tips, and insights in the home improvement world. Let’s create a home that is not just a place to live, but a reflection of style and personality.