Contents
Step-by-Step Guide How to Propagate String of Pearls Successfully

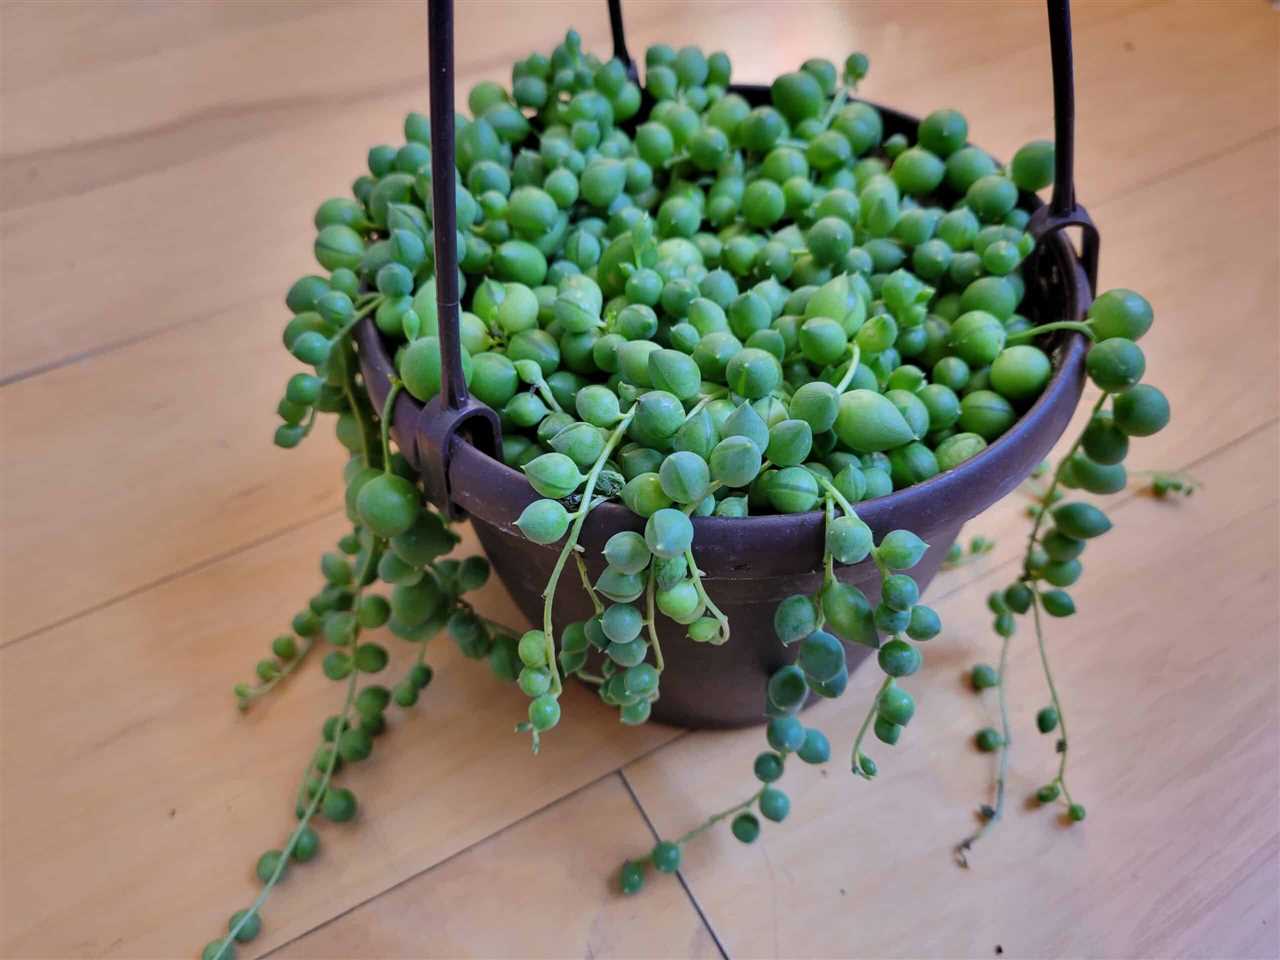
The string of pearls, also known as Senecio rowleyanus, is a popular trailing succulent that features long stems adorned with small, spherical leaves that resemble pearls. This unique plant is native to South Africa and is highly sought after for its delicate beauty and low maintenance requirements. If you want to expand your collection or share the beauty of this plant with others, propagating string of pearls is a simple and rewarding process.
Propagating string of pearls can be done through various methods, including stem cuttings, division, and leaf cuttings. Each method has its own advantages and challenges, but with the right techniques and care, you can successfully propagate this stunning succulent.
In this step-by-step guide, we will walk you through the process of propagating string of pearls using stem cuttings, as it is the most common and reliable method. You will learn how to select the right stem, prepare it for propagation, and create the optimal conditions for successful root formation. With patience and a little bit of knowledge, you will soon have a new string of pearls plant to enjoy or share with fellow plant enthusiasts.
Choosing the Right Time and Tools

When it comes to propagating string of pearls, timing is crucial. The best time to propagate your string of pearls is during the spring or early summer when the plant is actively growing. This is when the plant is most likely to produce healthy and robust cuttings that will quickly root and grow into new plants.
Before you start propagating your string of pearls, gather the necessary tools. Here are the tools you will need:
- Sharp scissors or pruning shears: You will need a sharp tool to make clean cuts on the stems of your string of pearls.
- Small pots or containers: Prepare small pots or containers with drainage holes to plant the cuttings.
- Well-draining potting mix: Use a well-draining potting mix that is suitable for succulents. This will ensure that the cuttings do not sit in water and rot.
- Rooting hormone (optional): Rooting hormone can help speed up the rooting process and increase the chances of success, but it is not necessary.
- Misting bottle: A misting bottle filled with water can be helpful in providing moisture to the cuttings during the rooting process.
Having these tools ready before you begin will make the process smoother and more efficient.
Selecting the Ideal Time for Propagation

When it comes to propagating string of pearls, timing is crucial. To ensure successful propagation, it’s important to choose the ideal time for the process. Here are some tips on when to propagate your string of pearls:
- Spring or summer: The best time to propagate string of pearls is during the spring or summer months. This is when the plant is actively growing and has a higher chance of root development.
- Avoid winter: It’s generally not recommended to propagate string of pearls during the winter months. The plant tends to go dormant during this time, which can make it more difficult for the cuttings to establish roots.
- Choose a warm day: Select a warm day for propagation, as the warmth will help stimulate root growth. Avoid propagating on cold or rainy days, as the excess moisture can lead to rotting of the cuttings.
- Consider the plant’s health: Before propagating, assess the health of your string of pearls. If the plant is stressed or showing signs of disease or pests, it’s best to wait until it’s in better condition before attempting propagation.
By following these guidelines and selecting the ideal time for propagation, you can increase your chances of success in propagating your string of pearls.
Gathering the Necessary Tools

Before you begin propagating your string of pearls, you will need to gather a few essential tools. These tools will help ensure that the process goes smoothly and that your pearls have the best chance of rooting and growing successfully.
- String of pearls plant: You will need a healthy string of pearls plant to use for propagation. Choose a plant with long, trailing stems and plenty of healthy pearls.
- Sharp scissors or pruning shears: You will need a pair of sharp scissors or pruning shears to cut the stems of the string of pearls plant. Make sure they are clean and sterilized to prevent the spread of any diseases or pests.
- Small pots or containers: You will need small pots or containers to plant your propagated pearls. Choose pots with drainage holes to prevent overwatering.
- Well-draining potting mix: Use a well-draining potting mix specifically designed for succulent plants. This will help prevent overwatering and root rot.
- Rooting hormone (optional): Rooting hormone can help promote root growth and increase the chances of successful propagation. It is not necessary, but it can be beneficial.
- Misting bottle: A misting bottle filled with water will be useful for misting the pearls during the rooting process.
- Clear plastic bag or plastic wrap: Covering your propagated pearls with a clear plastic bag or plastic wrap can help create a humid environment that promotes rooting.
- Labels: It’s a good idea to label your pots or containers with the date of propagation and any other relevant information. This will help you keep track of your progress and make any necessary adjustments.
- Watering can or spray bottle: You will need a watering can or spray bottle to water your pearls after they have rooted. Be careful not to overwater, as this can lead to root rot.
Once you have gathered all of these necessary tools, you will be ready to start propagating your string of pearls. Make sure you have a clean and organized workspace, and follow the step-by-step guide to ensure success.
Preparing the String of Pearls

Before propagating your string of pearls, there are a few things you need to do to ensure success. Follow these steps to properly prepare your plant:
- Choose a healthy string of pearls: Select a plant that is healthy and free from any diseases or pests. Look for a string of pearls with vibrant green leaves and plump, well-formed pearls.
- Prepare a clean workspace: Find a clean, well-lit area where you can work on propagating your string of pearls. Make sure the area is free from clutter and has enough space to accommodate the plant and necessary materials.
- Gather your materials: To propagate your string of pearls, you will need a sharp pair of scissors, a clean container with drainage holes, well-draining soil or succulent mix, and a spray bottle filled with water.
- Water the plant: Before starting the propagation process, water your string of pearls thoroughly. This will help ensure that the plant is hydrated and ready for the propagation process.
- Prepare the container: Fill the clean container with well-draining soil or succulent mix. Make sure the container has drainage holes to prevent waterlogging, which can lead to root rot.
- Identify the nodes: Nodes are the points where the pearls are attached to the string. Look for healthy nodes on the string of pearls, as these are the areas where new roots will form.
- Cut the string: Using a sharp pair of scissors, carefully cut the string of pearls into smaller sections, making sure each section has at least one healthy node. Each section should ideally have 3-5 pearls.
- Allow the cuttings to callus: After cutting the string of pearls, set the cuttings aside in a dry, well-ventilated area for a few days. This will allow the cut ends to callus, which helps prevent rotting when planted.
By following these steps to prepare your string of pearls, you will be setting the stage for successful propagation. Once your plant is prepared, you can move on to the next steps in the propagation process.
Inspecting the Mother Plant

Before you begin propagating your string of pearls, it’s important to inspect the mother plant to ensure it is healthy and suitable for propagation. Here’s how to inspect your mother plant:
- Check for healthy pearls: Examine the pearls on the mother plant and make sure they are plump and firm. Avoid propagating from pearls that are shriveled, discolored, or damaged.
- Look for root nodes: Inspect the stems of the mother plant for small bumps or nodes where roots may develop. These nodes are crucial for successful propagation.
- Check for signs of disease or pests: Carefully examine the leaves and stems of the mother plant for any signs of disease, such as yellowing or wilting, or pests, such as mealybugs or spider mites. If you notice any issues, treat them before proceeding with propagation.
- Assess overall plant health: Take a step back and evaluate the overall health of the mother plant. Look for signs of vitality, such as vibrant green leaves and strong stems. A healthy mother plant will have a better chance of producing healthy offspring.
By thoroughly inspecting the mother plant, you can ensure that you are starting the propagation process with the best possible material. This will increase the chances of successful propagation and the growth of strong and healthy string of pearls plants.
Identifying Healthy Stems for Propagation

When propagating string of pearls, it is important to select healthy stems to ensure successful growth. Here are some tips for identifying healthy stems:
- Appearance: Look for stems that have a vibrant green color and are free from any discoloration or browning. Healthy stems should also be plump and firm to the touch.
- Length: Choose stems that are at least 3-4 inches long. Longer stems are preferable as they provide more room for the pearls to grow.
- Leaf Nodes: Examine the stems closely for leaf nodes. These are small, round bumps along the stem where the pearls grow from. Select stems that have multiple leaf nodes as they have a higher chance of producing new growth.
- No Signs of Disease or Pests: Inspect the stems for any signs of disease or pests. Look out for yellowing leaves, webbing, or any unusual spots. These can indicate the presence of pests or diseases that can hinder the propagation process.
By carefully selecting healthy stems for propagation, you increase the chances of successful growth and the development of a thriving string of pearls plant.
Trimming and Cleaning the Chosen Stems

Before you can propagate your string of pearls, you need to carefully select and prepare the stems that you will be using. Follow these steps to trim and clean the chosen stems:
- Choose healthy stems: Look for stems that are long, healthy, and free from any signs of damage or disease. It’s important to select stems that are strong and have several sets of leaves.
- Prepare your tools: Gather a pair of clean, sharp scissors or pruning shears, a clean container filled with water, and a clean, dry towel.
- Trim the stems: Carefully trim the chosen stems from the mother plant, making sure to leave a few inches of stem attached to the pearls. This will give you enough room to plant the stem in the soil or water.
- Remove excess leaves: Remove any excess leaves from the lower portion of the stem. This will help prevent the leaves from rotting when they come into contact with the soil or water.
- Clean the stems: Rinse the trimmed stems under lukewarm water to remove any dirt or debris. Gently pat them dry with a clean towel.
Once you have trimmed and cleaned the chosen stems, you are ready to propagate your string of pearls using your preferred method – either rooting in water or planting directly in soil.
Propagating the String of Pearls

Propagating the String of Pearls is a simple and rewarding process that allows you to create new plants from an existing one. Here is a step-by-step guide on how to propagate the String of Pearls:
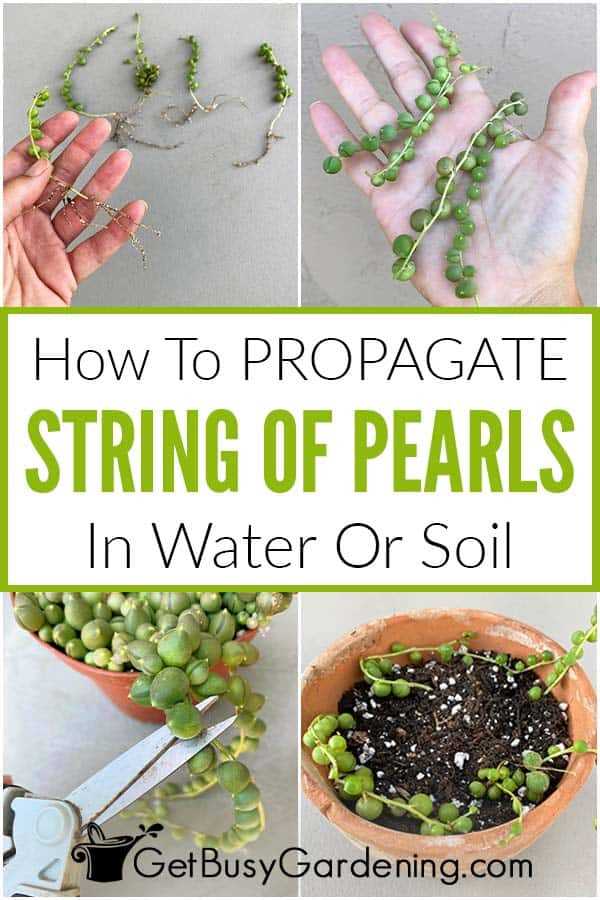
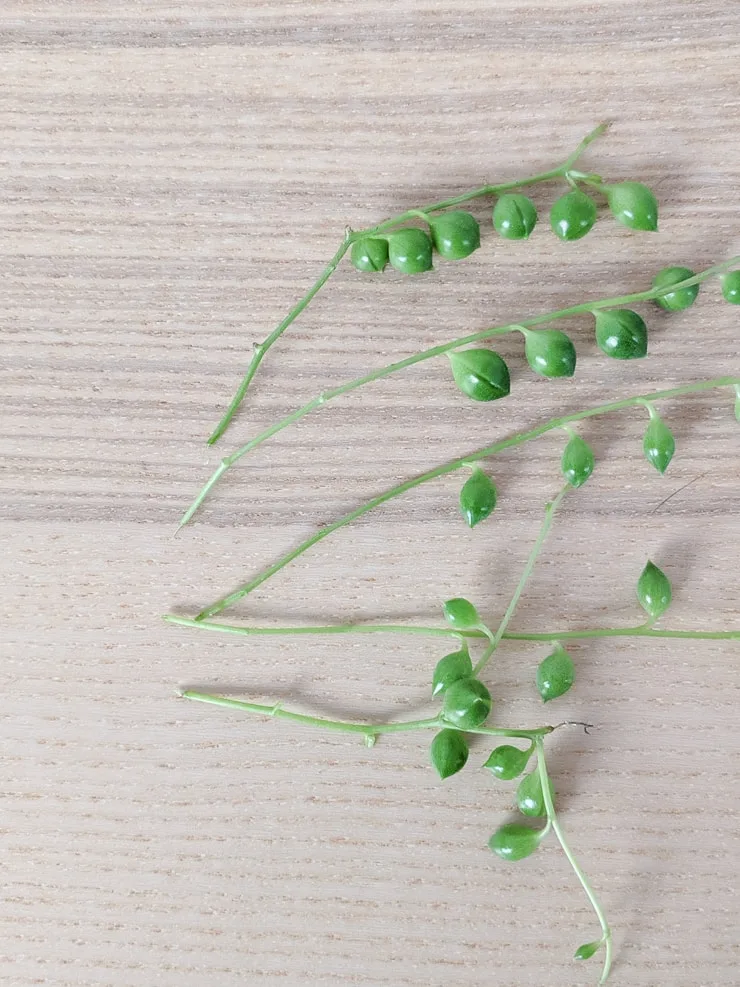
- Prepare the cuttings: To propagate the String of Pearls, you will need to take cuttings from the mother plant. Choose healthy stems that are long enough and have multiple pearls. Using a clean and sharp pair of scissors or pruning shears, cut the stems just below a set of leaves.
- Let the cuttings callus: After taking the cuttings, it’s important to let them dry and callus before planting them. Place the cuttings in a well-ventilated area away from direct sunlight and let them sit for a few days until the ends become slightly hardened and callused.
- Prepare the planting medium: While the cuttings are callusing, prepare the planting medium. The String of Pearls prefers a well-draining soil mix. You can use a combination of cactus soil and perlite or a succulent-specific potting mix. Fill a small pot or container with the prepared soil mix.
- Plant the cuttings: Once the cuttings have callused, it’s time to plant them. Make small holes in the soil mix using your finger or a pencil. Gently insert the cuttings into the holes, making sure the callused ends are covered with soil. Press the soil around the cuttings to secure them in place.
- Provide proper care: After planting, place the pot in a bright location with indirect sunlight. Avoid placing it in direct sunlight as it can scorch the delicate leaves. Water the cuttings sparingly, allowing the soil to dry out between waterings. Overwatering can lead to root rot.
- Monitor the progress: Keep an eye on the cuttings and monitor their progress. It may take several weeks for the cuttings to establish roots and start growing. During this time, avoid disturbing the cuttings and be patient.
- Transplant the new plants: Once the cuttings have rooted and are showing signs of new growth, they can be transplanted into their own individual pots. Use the same soil mix and potting technique as before. Provide the new plants with the same care as mature String of Pearls plants.
Following these steps will help you successfully propagate the String of Pearls and expand your collection of these beautiful trailing succulents. Enjoy the process and watch as your new plants thrive and grow!
Choosing the Propagation Method

When it comes to propagating string of pearls, there are a few different methods you can choose from. Each method has its own advantages and disadvantages, so it’s important to consider your specific circumstances and preferences before deciding how to proceed.
1. Water Propagation:
This method involves placing the cuttings in water until they develop roots. It is a popular choice because it is relatively easy and allows you to monitor the progress of the roots. However, it can be time-consuming and may require more attention to ensure the cuttings do not rot.
2. Soil Propagation:
This method involves planting the cuttings directly into soil. It is a straightforward approach that mimics the natural growth conditions of the string of pearls. This method is generally less time-consuming than water propagation, but it can be more difficult to monitor the root development.
3. Combination Method:
Some gardeners prefer to use a combination of water and soil propagation. They start by placing the cuttings in water until roots develop, and then transfer them to soil. This method combines the benefits of both water and soil propagation, but it requires more steps and attention to detail.
4. Air Layering:
Air layering is a more advanced propagation method that involves creating a wound on the stem, wrapping it with moist moss or rooting hormone, and then covering it with plastic wrap. This method encourages roots to develop before detaching the new plant from the parent plant. Air layering can be more time-consuming and challenging, but it can result in a well-established plant.
Ultimately, the choice of propagation method depends on your experience level, time availability, and personal preferences. Experiment with different methods to find the one that works best for you and your string of pearls.
Video:Step-by-Step Guide How to Propagate String of Pearls Successfully
Hello, I am Beverly J. Sanders, the voice behind the diverse articles you come across on styves.co.za. My passion lies in exploring the nuances of home improvement and sharing tips that can help you transform your living space into a haven of comfort and style. From the latest trends in home decor to practical cleaning advice, I cover a broad spectrum of topics to cater to a wide variety of interests.
In my recent works, I have delved into the advantages of incorporating a horizontal Murphy bed into your home to save space without compromising on design and functionality. I also explored the benefits of having a free-standing electric fireplace that not only adds warmth to your home but also brings a sleek and modern design to any living space. My articles are a rich resource, offering insights into different products and home improvement strategies that can enhance the quality of your life.
I believe in the power of details; a belief that reflects in my comprehensive guides where I discuss even the overlooked aspects of home decor, such as the impact of baseboard trim in enhancing the overall look and feel of your home. I am constantly on the lookout for innovative solutions and products that can add value to your home and life.
Join me in my exploration as I continue to bring you the latest trends, tips, and insights in the home improvement world. Let’s create a home that is not just a place to live, but a reflection of style and personality.