Contents
- 1 Elephant Ear Bulbs A Guide to Planting and Caring for Elephant Ear Bulbs
- 1.1 What are Elephant Ear Bulbs?
- 1.2 Benefits of Planting Elephant Ear Bulbs
- 1.3 Choosing the Right Location
- 1.4 Preparing the Soil
- 1.4.1 Step 1: Choose a Suitable Location
- 1.4.2 Step 2: Clear the Area
- 1.4.3 Step 3: Prepare the Soil
- 1.4.4 Step 4: Test the pH Level
- 1.4.5 Step 5: Amend the Soil
- 1.4.6 Step 6: Mix in Fertilizer
- 1.4.7 Step 7: Create a Planting Hole
- 1.4.8 Step 8: Plant the Bulb
- 1.4.9 Step 9: Water the Plant
- 1.4.10 Step 10: Provide Support
- 1.4.11 Step 11: Mulch the Soil
- 1.4.12 Step 12: Regular Maintenance
- 1.5 Planting Elephant Ear Bulbs
- 1.6 Caring for Elephant Ear Bulbs
- 1.7 Video:Elephant Ear Bulbs A Guide to Planting and Caring for Elephant Ear Bulbs
Elephant Ear Bulbs A Guide to Planting and Caring for Elephant Ear Bulbs

Are you looking to add some lush greenery to your garden or landscaping? Look no further than elephant ear bulbs! These unique bulbs are a must-have for any gardener or plant enthusiast.
What are Elephant Ear Bulbs?
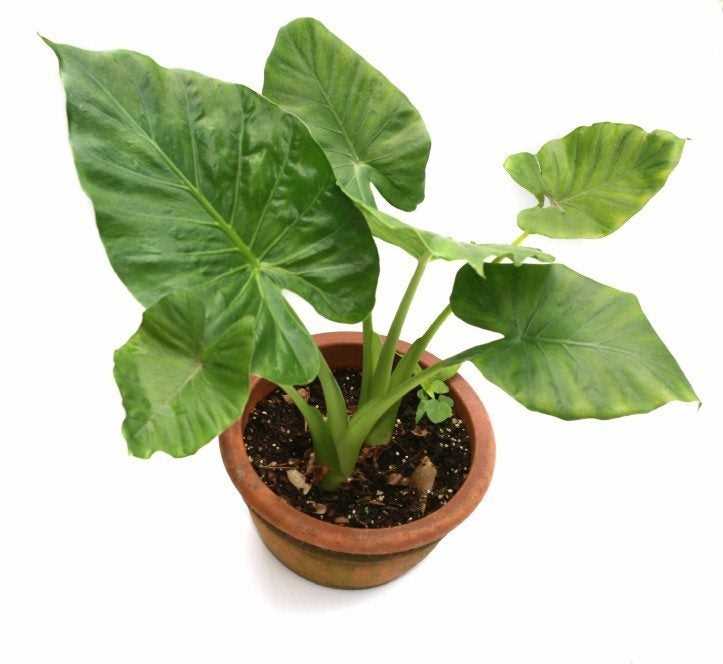
Elephant ear bulbs, also known as Colocasia or Alocasia bulbs, are tropical plants that are known for their large, heart-shaped leaves. These bulbs are easy to grow and can add a touch of exotic beauty to any outdoor space.
Planting Elephant Ear Bulbs
When planting elephant ear bulbs, it’s important to choose a location that receives partial to full sun. These plants thrive in moist, well-draining soil, so make sure to prepare the planting area accordingly.
Before planting, soak the bulbs in water for a few hours to help promote healthy growth. Dig a hole that is about twice the size of the bulb and place the bulb in the hole with the pointed side facing up. Cover the bulb with soil and water thoroughly.
Caring for Elephant Ear Bulbs
Once planted, elephant ear bulbs require regular watering to keep the soil consistently moist. However, be careful not to overwater, as this can lead to root rot. Fertilize the plants every few weeks during the growing season to promote healthy foliage.
These tropical plants also benefit from regular pruning. Remove any dead or damaged leaves to keep the plant looking its best. Additionally, elephant ear bulbs can be dug up and stored indoors during the winter months in colder climates.
Tip: Elephant ear bulbs can be grown in containers, making them a versatile option for those with limited garden space.
Conclusion
If you’re looking to add a touch of tropical beauty to your garden or landscaping, consider planting elephant ear bulbs. With their large, lush leaves, these plants are sure to make a statement in any outdoor space. Follow the planting and care tips outlined above, and you’ll be well on your way to enjoying the beauty of elephant ear bulbs.
What are Elephant Ear Bulbs?
Elephant ear bulbs are a type of tropical plant bulb that is known for its large, ear-shaped leaves. These bulbs are a popular choice for landscaping and gardening due to their unique and eye-catching greenery.
Elephant ear bulbs are easy to plant and care for, making them a great option for both experienced gardeners and beginners. These bulbs can be planted in gardens, pots, or containers, allowing for versatility in your landscaping design.
When planted, elephant ear bulbs grow into large plants with impressive leaves that can reach up to 3 feet in length. The leaves have a distinct shape that resembles an elephant’s ear, hence the name.
These bulbs thrive in warm and humid climates, making them an ideal choice for tropical gardens. They can also be grown indoors in containers, providing a touch of exotic beauty to any space.
Whether you’re looking to add a statement piece to your garden or want to bring a touch of the tropics into your home, elephant ear bulbs are a fantastic choice. Their unique leaves and easy care make them a popular option for plant enthusiasts of all levels.
Benefits of Planting Elephant Ear Bulbs
1. Exotic and Tropical Appeal
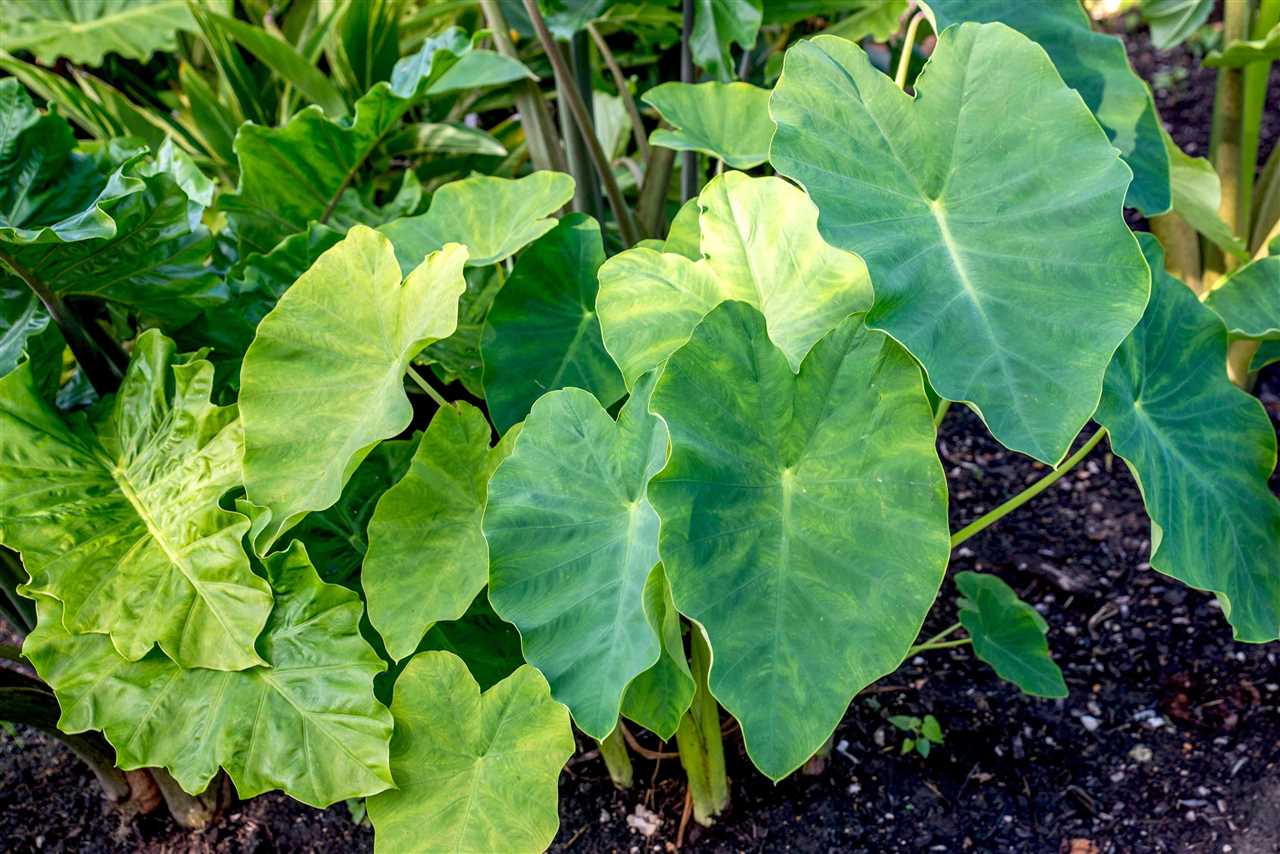
Planting elephant ear bulbs can add an exotic and tropical touch to your garden. These bulbs produce large, lush leaves that resemble elephant ears, hence their name. The unique and striking foliage of the elephant ear plant can create a beautiful focal point in your garden or landscaping.
2. Easy to Grow
Elephant ear bulbs are relatively easy to grow, making them a great choice for both experienced and novice gardeners. These bulbs thrive in warm and humid climates, but they can also be grown in containers indoors. With proper care and maintenance, you can enjoy the beauty of elephant ear plants without much hassle.
3. Versatile Landscaping Options
Elephant ear bulbs can be used in various landscaping designs and arrangements. They can be planted as standalone specimens or combined with other plants to create a lush and vibrant greenery. The large leaves of the elephant ear plant can provide shade and create a dramatic backdrop for other flowers or shrubs in your garden.
4. Low Maintenance
Once established, elephant ear bulbs require minimal maintenance. These plants are known for their resilience and ability to adapt to different growing conditions. They can tolerate both sun and shade, as well as a range of soil types. With regular watering and occasional fertilization, your elephant ear plants will thrive and continue to enhance your garden for years to come.
5. Unique and Eye-Catching Foliage
The standout feature of elephant ear plants is their impressive foliage. The leaves can grow to be several feet long and wide, creating a bold statement in any garden. The vibrant green color and distinct shape of the leaves make the elephant ear plant a standout choice for those looking to add visual interest and texture to their outdoor space.
6. Attracts Wildlife

The lush foliage of the elephant ear plant can attract various types of wildlife to your garden. Birds, butterflies, and bees are often drawn to the nectar-rich flowers that sometimes bloom on the plant. By planting elephant ear bulbs, you can create a welcoming habitat for these beneficial creatures and contribute to the overall biodiversity of your garden.
7. Long-Lasting Beauty
Elephant ear bulbs can provide long-lasting beauty in your garden. These plants are perennial, meaning they will come back year after year with proper care. The large leaves and unique growth habit of the elephant ear plant make it a standout feature in any garden, providing beauty and interest for many seasons to come.
Overall, planting elephant ear bulbs offers numerous benefits for gardeners and landscaping enthusiasts. From their exotic appeal to their low maintenance requirements, these plants can enhance the beauty and greenery of any outdoor space.
Choosing the Right Location
When it comes to gardening and landscaping, choosing the right location for your plants is crucial for their growth and overall health. This is especially true for tropical plants like elephant ear bulbs, which require specific conditions to thrive.
Sunlight
Elephant ear bulbs love bright, indirect sunlight. They should be placed in an area that receives at least 4-6 hours of sun per day. However, direct sunlight can scorch the leaves, so it’s important to provide some shade during the hottest parts of the day.
Temperature
These tropical bulbs prefer warm temperatures between 70-85°F (21-29°C). They are not frost-tolerant, so make sure to plant them after the threat of frost has passed. If you live in a cooler climate, you can start the bulbs indoors and move them outside once the weather warms up.
Soil
Elephant ear bulbs thrive in well-draining soil that is rich in organic matter. They prefer a slightly acidic to neutral pH level. Before planting, amend the soil with compost or well-rotted manure to improve its fertility and drainage.
Watering
These plants require consistent moisture, but they don’t like to sit in waterlogged soil. Water them when the top inch of soil feels dry, and make sure to provide enough water to thoroughly moisten the root zone. During hot, dry periods, you may need to water them more frequently.
Space
Elephant ear bulbs need plenty of space to grow. The leaves can reach impressive sizes, so make sure to provide enough room for them to spread out. Plant them at least 2-3 feet apart to allow for proper air circulation and prevent overcrowding.
Container Planting
If you don’t have a suitable garden spot, elephant ear bulbs can also be grown in containers. Choose a large pot with drainage holes and fill it with a well-draining potting mix. Make sure the container is big enough to accommodate the mature size of the plant.
Conclusion
By choosing the right location for your elephant ear bulbs, you can ensure that they thrive and provide a beautiful addition to your garden or landscaping. Remember to consider factors such as sunlight, temperature, soil, watering, space, and container planting to create the ideal growing conditions for these tropical beauties.
Preparing the Soil
Step 1: Choose a Suitable Location
Before planting your elephant ear bulbs, it is important to select a suitable location in your garden. These tropical plants thrive in areas with full or partial sun and well-drained soil.
Step 2: Clear the Area
Clear the area where you plan to plant the bulbs of any weeds or debris. This will help prevent competition for nutrients and ensure the optimal growth of your elephant ear plants.
Step 3: Prepare the Soil
It is important to prepare the soil before planting your elephant ear bulbs. Start by loosening the soil with a garden fork or tiller to a depth of about 12 inches. This will help improve drainage and allow the roots to grow freely.
Next, add organic matter such as compost or well-rotted manure to enrich the soil. This will provide essential nutrients for the growth of your elephant ear plants.
Step 4: Test the pH Level
Testing the pH level of your soil is important to ensure that it is suitable for elephant ear plants. These plants prefer slightly acidic to neutral soil with a pH range of 6.0 to 7.0. You can use a soil testing kit to determine the pH level of your soil.
Step 5: Amend the Soil
If the pH level of your soil is not within the desired range, you can amend it accordingly. To lower the pH, add sulfur or peat moss. To raise the pH, add lime or wood ash. Follow the instructions on the product packaging for the correct application rate.
Step 6: Mix in Fertilizer
Before planting your elephant ear bulbs, mix in a slow-release fertilizer according to the package instructions. This will provide a steady supply of nutrients to your plants throughout the growing season.
Step 7: Create a Planting Hole

Dig a hole that is large enough to accommodate the bulb of your elephant ear plant. The hole should be about 2 to 3 times the size of the bulb.
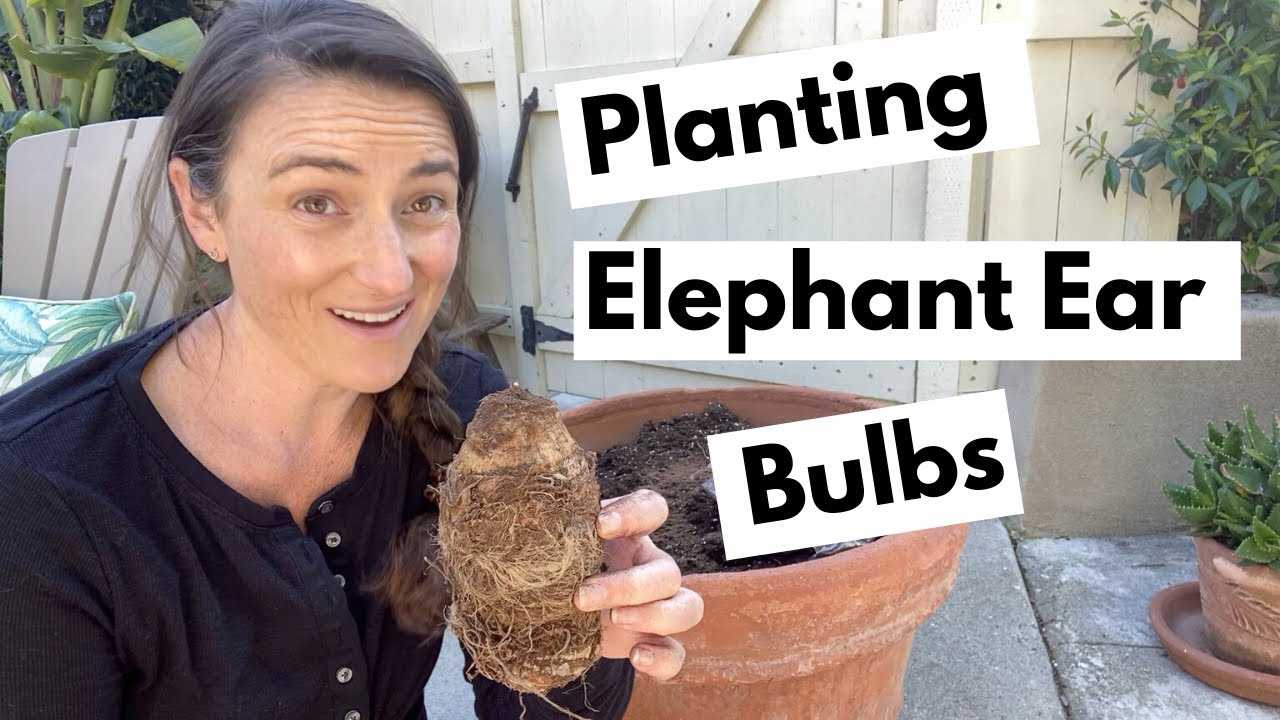
Step 8: Plant the Bulb
Place the bulb in the planting hole with the pointed end facing upwards. Cover the bulb with soil, leaving the top portion of the bulb exposed. Gently firm the soil around the bulb to ensure good contact.
Step 9: Water the Plant
After planting, water the soil thoroughly to settle it around the bulb. Keep the soil consistently moist, but not waterlogged, throughout the growing season. Water deeply and regularly, especially during dry spells.
Step 10: Provide Support
As your elephant ear plant grows, it may need support to prevent it from toppling over. You can use stakes or cages to provide support for the plant’s tall and broad leaves.
Step 11: Mulch the Soil
Apply a layer of organic mulch around the base of your elephant ear plant to help retain moisture, suppress weeds, and regulate soil temperature. Leave a gap around the stem to prevent rotting.
Step 12: Regular Maintenance
Regularly monitor your elephant ear plant for any signs of pests or diseases. Remove any dead or damaged leaves to promote healthy growth. Fertilize the plant every 4 to 6 weeks during the growing season to provide a continuous supply of nutrients.
By following these steps, you can ensure that your elephant ear bulbs are planted in well-prepared soil, providing the optimal conditions for their growth and the beauty of their tropical leaves in your garden.
Planting Elephant Ear Bulbs
Introduction
Do you want to add a touch of tropical greenery to your landscaping or garden? Planting elephant ear bulbs is the perfect way to achieve that! These magnificent plants, also known as Alocasia, Colocasia, or Caladium, are known for their large, vibrant leaves that resemble elephant ears. In this guide, we will walk you through the process of planting and caring for elephant ear bulbs, so you can enjoy their beauty and lushness in your outdoor space.
Choosing the Right Spot

Before you start planting your elephant ear bulbs, it’s important to choose the right spot in your garden or landscape. Elephant ears thrive in partial shade to full sun, so look for a location that receives at least 4-6 hours of sunlight per day. They also prefer moist, well-drained soil, so make sure the spot you choose has good drainage.
Planting Process
Now that you have found the perfect spot, it’s time to start planting your elephant ear bulbs:
- Prepare the soil by loosening it with a garden fork or tiller. Remove any weeds or debris.
- Dig a hole that is 2-3 times the size of the bulb. The hole should be deep enough to cover the bulb with 1-2 inches of soil.
- Place the bulb in the hole with the pointed end facing up. If you are planting multiple bulbs, space them about 1-2 feet apart.
- Fill the hole with soil, gently pressing it down to remove any air pockets.
- Water the newly planted bulbs thoroughly to settle the soil.
Caring for Elephant Ear Bulbs
Once you have planted your elephant ear bulbs, it’s important to provide them with the right care to ensure their healthy growth:
- Water the plants regularly, keeping the soil moist but not waterlogged. Elephant ears require consistent moisture.
- Fertilize the plants every 4-6 weeks with a balanced, slow-release fertilizer to provide them with the necessary nutrients.
- Remove any yellow or damaged leaves to promote new growth.
- Consider applying a layer of mulch around the plants to help retain moisture and suppress weed growth.
- Protect the plants from extreme cold temperatures by covering them or moving them indoors during the winter months.
Conclusion
Planting elephant ear bulbs is a great way to add a touch of tropical beauty to your landscaping or garden. By following the steps outlined in this guide, you can successfully plant and care for these stunning plants. Enjoy the lushness and vibrancy that elephant ears bring to your outdoor space!
Caring for Elephant Ear Bulbs
Planting Elephant Ear Bulbs
- Choose a location with partial shade to full sun.
- Ensure the soil is well-drained and rich in organic matter.
- Dig a hole that is two to three times the size of the bulb.
- Place the bulb in the hole with the pointed end facing up.
- Cover the bulb with soil, leaving the top of the bulb slightly exposed.
- Water the bulb thoroughly after planting.
Caring for Elephant Ear Bulbs
- Water the bulbs regularly, keeping the soil consistently moist but not waterlogged.
- Apply a slow-release fertilizer in early spring and midsummer.
- Remove any yellow or damaged leaves to promote healthy growth.
- Protect the bulbs from frost by covering them with a layer of mulch in colder climates.
- Provide support for taller varieties to prevent them from flopping over.
- Monitor for pests such as snails and slugs, and take appropriate measures to control them.
Overwintering Elephant Ear Bulbs
- In colder climates, dig up the bulbs before the first frost.
- Trim off the foliage, leaving a short stub at the top of the bulb.
- Store the bulbs in a cool, dry place for the winter.
- Check on the bulbs periodically and discard any that show signs of rot or damage.
- Replant the bulbs in the spring after the danger of frost has passed.
By following these care instructions, you can enjoy the lush greenery and tropical beauty of elephant ear plants in your garden.
Video:Elephant Ear Bulbs A Guide to Planting and Caring for Elephant Ear Bulbs
Planting Elephant Ears in a Pot. Acorn Hill Alocasia in Pot. Growing Elephant Ears
Bulb Planting Elephant Ear – UPDATE! | Plus Tips for Indoor and Outdoor Success
Complete Alocasia Care Guide | Elephant Ear Houseplant Care and Propagation
Hello, I am Beverly J. Sanders, the voice behind the diverse articles you come across on styves.co.za. My passion lies in exploring the nuances of home improvement and sharing tips that can help you transform your living space into a haven of comfort and style. From the latest trends in home decor to practical cleaning advice, I cover a broad spectrum of topics to cater to a wide variety of interests.
In my recent works, I have delved into the advantages of incorporating a horizontal Murphy bed into your home to save space without compromising on design and functionality. I also explored the benefits of having a free-standing electric fireplace that not only adds warmth to your home but also brings a sleek and modern design to any living space. My articles are a rich resource, offering insights into different products and home improvement strategies that can enhance the quality of your life.
I believe in the power of details; a belief that reflects in my comprehensive guides where I discuss even the overlooked aspects of home decor, such as the impact of baseboard trim in enhancing the overall look and feel of your home. I am constantly on the lookout for innovative solutions and products that can add value to your home and life.
Join me in my exploration as I continue to bring you the latest trends, tips, and insights in the home improvement world. Let’s create a home that is not just a place to live, but a reflection of style and personality.